Showing posts with label DIY. Show all posts

Tuesday, February 03, 2015

DIY Stick Frames

If two things could be said about me without a doubt it would be:
1) I love a rustic home and 2) the words waste not want not is my
mantra. That's why these stick frames and re-purposed agenda art
is a total win-win in my books. These frames are wonderful if
you're looking for an easy and inexpensive do-it-yourself way
to do a gallery wall. 

The steps to this are pretty easy: just glue the picture to the
cardboard backing and then glue the sticks to the cardboard.
You can use any kind of stick or twig, I used drift wood as
well as birch. Your frame can be a flush rectangle or the
sticks can cross over one another - options are endless! Cut
off whatever cardboard is showing. If you'd like to hang
them glue some jute on each side of the top. 

Sunday, January 18, 2015

DIY Satchel

Am I ever excited to share the latest DIY project: a satchel! My
major goal for 2015 - and the rest of my life - is to become more
self-sufficient. I'm not going to lie, at times it can seem overwhelming
and as if I'm not getting anywhere. But like the tortoise won the race,
slow and steady is the way to go! I had this thick wool fabric from an
old poncho I never wore and I've been trying to think of ways to use
it. The colours of the fabric remind me of Peruvian bags, so I went
in that direction. The satchel is pretty basic, but I love the fact that
my hands made it. Never doubt yourself! 
- Silly me, I forgot to picture the thread! I used white thread for
everything except the flap, for which I used a light purple. Colours
were chosen based on the colour of my fabric. I also used a thicker
thread, I like to do this when working with wool, which is heavier. 
- Cut fabric into a long rectangle. The length and width depends
on the size you would your satchel to be. 
- Along the length of fabric fold the sides inwards. How wide you
would like your satchel is up to you. Mine is 8 inches wide. Try to
make this as straight as possible. Tip: ironing the sides keeps them
in place and makes it much easier to work with. 
- Bring the bottom of your fabric up almost to the top. Leave fabric
at the top for your flap. Again, the length (or depth) of the satchel
is up to you. Mine is 11 inches. 
- Outside view of satchel-to-be. Sew back and front together, this 
is done by pulling the satchel inside out and sewing along the
outer sides. 
- The striped fabric made sewing in straight lines easy, this might
be more difficult to accomplish without stripes. 
- For the strap I used a wool fabric belt that came with a sweater.
Anything that is long and strong enough will work though - be
creative! I folded the belt in half and sewed that to each side of
the satchel. 
And that's it! 

Friday, January 09, 2015

DIY Hanging Stick Wall Art

I've been seeing a lot stick wall art lately (see here, here, and here)
and decided to give it a go myself. I love the simplicity and how
dainty they are. I did mine a bit different from my inspirations,
with a sea-side themed bedroom and bathroom this was the
perfect opportunity for me to use my collected beach objects. 
The more I make our house a home the more I think about where
things come from and what they're made of. When my life ends I
don't want there to be a pile of my stuff left behind, a stain on an
otherwise beautiful blank canvass. This project was made up of
natural materials and leftover bits. The sticks, one shell, and sea
urchin were all found at the beach (See craft collecting post from
the summer, good thing I thought ahead!). The puka shells are from
a broken necklace (remember those things?!), while the jute and
feathers are from Michael's. Now, I've been looking into the origin
of craft feathers. I must say, there is a lot to read. I think I am going
to try to find local bird-friendly feathers. If there's anyone in the
Cape Breton area, or even the whole of Canada, that has information
on this, please do share! 

The instructions are fairly simple for this: just tie everything to the
stick with the jute! I added the beads so that the knot would be
hidden and to tuck the feathers tips in. Thanks for stopping by!

Sunday, December 14, 2014

DIY: Chalkboard Ornament

Christmas is such a wonderful time of year for pulling out the craft
box and keeping those hands busy. Handmade items can be either a
prized decoration for your home (and a wonderful conversation
starter) or a cherished gift for a loved one.  These chalkboard wood
slices might be my favourite project to date - they're rustic, simple,
and since they can be personalized they'll stand the test of time.
The fact that they're unbreakable is a plus too, if you have a
rambunctious kitten or a dog's wagging tail, then you'll enjoy
these wood ornaments. This project is a great one to do with
a friend or partner too - Paul and I had a blast making these!


Materials:

- Wood Slices (I have yet to buy some power tools so my mom cut
these. If you don't have access to a tree and power tools, I believe
craft stores, like Michael's, sells wood slices.)

- Chalkboard paint or spray

- Eye screws

-  Painter's or masking tape

-  Ribbon 

- Chalk 

Steps

1 Purchase wood slices or cut your own tree. My mom had some
trees in her yard she needed to remove. This year after Paul and I
take our tree down, we're going to cut that up into wood slices for
future DIY projects. As they say, waste not, want not. 

2 Tape sides of wood slices to stop paint from getting onto
the wood.

3  Spray/Paint wood slices. I had to do four coats, letting it dry
24 hours each time. Wood absorbs the paint more so than a wall
does; I only had to use two on my kitchen wall. 

4 Remove tape

5 Screw eye screw into the top

6 Add ribbon

7 Write whatever message you want - the best part! 

Wednesday, December 10, 2014

DIY: Mini Pine Cone Wreath Ornament

Here we are, another DIY as easy as the A-B-C's - not to mention
incredibly light on the wallet. So cheap you could collect sidewalk
change to pay for this project! The idea for this ornament came as
I was cutting the tops off pine cones for my wreaths and all these
little flakes fell off. Instead of throwing them away this is what I
did! Everything I used except for the glue was from the earth or
leftover bits, such as the cardboard and jute. If anyone knows of
an eco-friendly alternative for glue sticks, please share! So put
cheery Christmas music on, fill your glass with deliciously
creamy eggnog and go make some holiday crafts! 

Steps:

1 Take pine cone flakes off your collected pine cones.
Note: Try to take already fallen cones from several trees.
If they are damp and closed, just wait a couple of days,
they'll open up. 

2 Make wreath cut outs on cardboard or other non-flexible
material. Cut out. 

3 Glue pine cone flakes onto cut-out. 

4 Glue jute onto back. 

Easy-peasy!

Tuesday, December 02, 2014

DIY Pine Cone Wreath

My home just doesn't feel festive without a wreath - or three. 
Whether hanging on the door as an invitation or on the wall as an
art piece, wreaths are classic. They're a perfect addition to your
holiday decor since they can be personalized to the nines and are
very easy on the wallet (unless you choose otherwise that is). I also
find making holiday crafts puts me in the mood. Although, the
glass of delicious cold eggnog on the table and the Christmas
movie playing on the TV might have something to do with it! 


Materials:

Pine cones
Glue gun 
Glue sticks 
Cardboard
Scissors 
Ribbon

Steps:

1. Collect a whole bunch of pine cones.

2.  On cardboard, or another semi-flexible
material, draw a circle. I used bowls of
various shapes. 

3. Cut out the circles. To cut out the middle,
fold the circle in half. 

4. I used only the tips of the pine cones, that
way the wreaths are more flat. This is optional.
If you do cut them, save the ends and pieces
that fall off, I have for you a tree ornament
that will use all those bits up! 

5. Glue the pine cones facing upright onto the
cardboard. 

6. Hang with ribbon. This is also optional. 

And voila! That's it. Pretty simple and very
inexpensive. I'm not sure how the pine cones
will hold up, if at all, this is the first one I've
made. My goal this Christmas is to make my
own things as much as possible, to refrain from
buying things made in say China or Vietnam.
Sorry, China and Vietnam, no offence meant
by calling you out there. I just think I ought
to support my own country; you know,
promote industry at home. I know - who
invited Debbie Downer? It's not so much a
pain for me as it is a way to test my creativity.
And I'll stop now. I have a bunch of DIY 
ornaments coming up in the next few weeks
so stay tuned!

Saturday, November 01, 2014

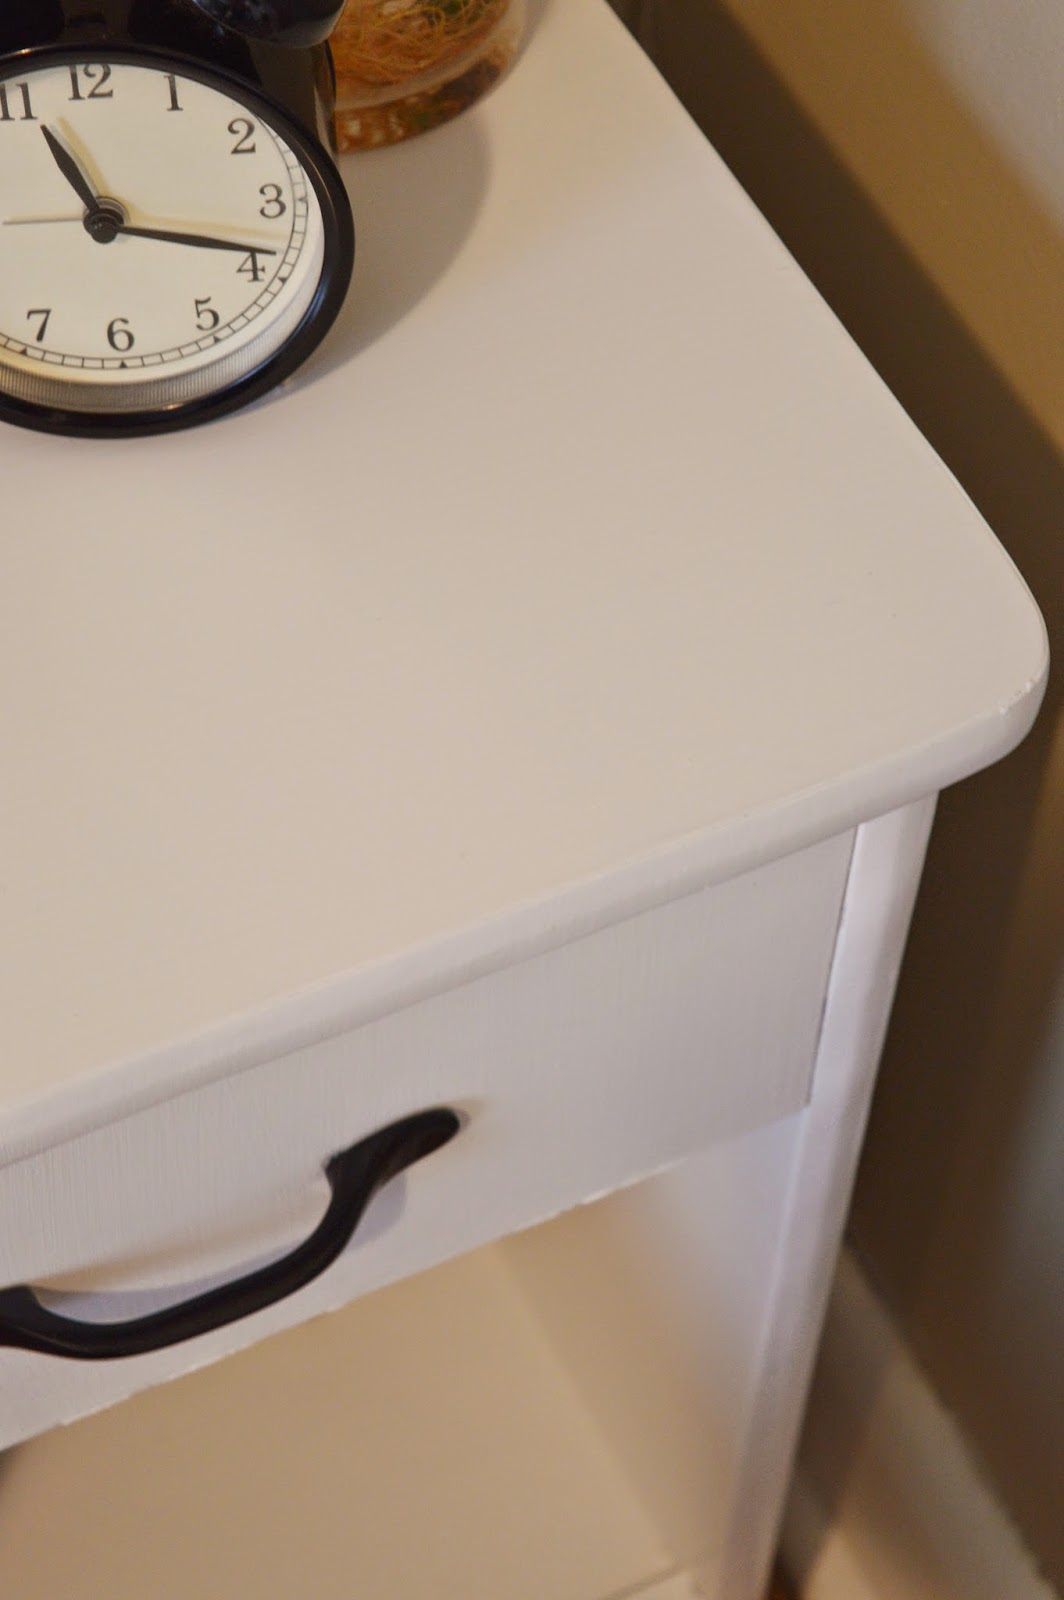
DIY: Refurbished Nightstand


It's that time of year again. The birds are flying south, our lives are blanketed in
darkness, and I turn to do-it-yourself projects. When the sun is shining and warms
my bare skin I can be found enjoying the great outdoors - nothing can keep me
inside. I do a complete 180 when the cold creeps upon us. My latest project is this
nightstand - with just a little paint and a new handle this baby is like brand new! I
don't think I'll try this again though.  Painting laminate furniture is quite a pain, it's
much much easier to paint wood. Great emphasis on the "much." Despite the many
layers of paint and waiting for them to dry, I am pleased with the results. Now
this once gaudy table fits perfectly in my by-the-ocean themed room. 
Here's to reinventing! 
Secondhand Nightstand
White Paint
Handle from Home Hardware

Tuesday, July 15, 2014

DIY: Planter

Well, since we all know my affinity for garbage and unwanted things you
can bet I'm a sucker for this DIY! I actually try to steer clear of canned
goods, so it did take me quite a while to acquire these. I'm really happy
with the result though, which means someone might have to go rummaging
through the neighbour's recycling soon! I can see my future clearly now:
the village bag lady. 

Thursday, May 22, 2014

DIY: Handmade Floral Crown


The sun is out and the grass is green - it's time to put on that pretty summer dress
and don a floral crown! These little things are magical.  As soon as you place one
upon your head you are instantly transported to another realm. Angels are singing
and harps are playing. All you desire is a meadow to run through deliriously happy.
It may be no secret that I dream of being a mischievous fairy working  for Mama N!

Living in a big city I feel that my floral crowns clash worse than a gangsta at a
Renaissance fair. In a little over a week I will live in a house with a forest to the
left of me and the Atlantic ocean to the right of me and no longer shall I feel out
of place with my wanna-be fairy princess 'tude. I have three floral crowns made
from the usual faux-flowers, but when perusing Pinterest I came across these
delicate floral crowns made from wire and nail polish - how original! Since this is
not my original idea and I very much stuck to the instructions given by someone
else, I'll just give the link (here) and just show my finished project. These were a
tad more difficult than the fake flower crowns and took a hell of a lot more time,
but the end result is totally worth the work! Enjoy!

Sunday, March 02, 2014

DIY: Boho Necklace

Inspiration found here. I've been practicing making complete dream catchers,
but I need to tweak a few things. So for now I went with an open circle.
- The large metal ring I used was an old earring. That's why it has those
holes, which makes it much, much easier!
And here again with yet another DIY.  Seems as if this blog has taken a little
d-tour. Winter can be a hard time of year when it comes to fashion. Paul
usually works until 5, at which point the sun has set. It's been too cold for me
to even think of removing my parka when I'm outside. My apartment faces the
north, something I didn't think of beforehand which seriously diminishes my
planting ability due to the lack of sun. I prefer to spend my time with friends
in cozy, dimly-lit cafes or dusty used bookstores. Not the best for picture
taking, although I prefer isolated areas for pictures rather than have an audience.
And apparently, it's been record-breakingly cold this winter! I knew I wasn't 
just being a baby.  I wonder if I'd have such an affinity and appreciation of
summer without the winter for a stark contrast.  You'll never catch me
complaining in the summer though: I'm a flower child through and through.

And apparently I've been channeling my inner flower child lately
through jewelry. I've never really been one for diamonds, glitz,
or sparkly things. I prefer neutral, earthy tones and semi-precious
stones. I also find myself moving towards my bohemian side more
and more as of late. Paul and I have been... let's just say, purging
our lives. It hasn't been easy either, especially considering no one
is patting you on the back and saying, "Job well done!" It's all in
the name of a greater cause and unfortunately there's no immediate
reward. Perhaps that is one of the very reasons people ignore
what the earth requires of us at this point. At first taking the stairs
over  the elevator was annoying, but now it's nothing.  And it's
not always easy on the wallet! Finding Canadian made products
is not only time-consuming, difficult, but also more expensive.
We also used to get all of our cleaning products, cream, milk,
and dry goods at Walmart...well, no more of that. It also takes
up a lot of your time. Researching companies and their business
 practices, where our food comes from, what's in our food. etc.
It's enough to make your head spin! I've kind of gotten off track,
but really, fashion tends to be a reflection of our personality, no?
Related Posts Plugin for WordPress, Blogger...